8.0 KiB
【第 5 章】网站建设篇
5.1 为什么要做一个网站?
新人也许会迷惑,为什么科学上网还要建一个网站?我不会编程啊,是不是特别麻烦?
先回答第一个问题,建网站的原因有:
- 申请合法的 TLS 证书(非常重要)
- 提供合理的回落,防止主动探测攻击,提高安全性
- 建设一个伪装站(如博客、私人网盘、多媒体网站、游戏网站等),直接访问时有合理的前台,使流量使用看上去更合理。
再回答第二个问题:
- 本文作为演示,仅仅使用了一个最简单的【单文件 html 页面 + Nginx】来搭建,以此完成上面的目标,所以【非常简单】
- 这个网站完全可以不仅仅是伪装,而是真的做大做强,这个复杂性就完全取决于你了
- 对于“伪装”和“网站运营”这个目标,需要的就是各不相同、秀出真我,需要的同学可以自行搜索学习。这个内容已经完全偏离了科学上网,本文就不深入解析了。
5.2 登录 VPS、安装运行 Nginx
-
这里用到的,都是之前已经详解过的命令,所以就不重复讲解了。看不懂的同学可以看看前面的章节哦。
sudo apt update && sudo apt install nginx -
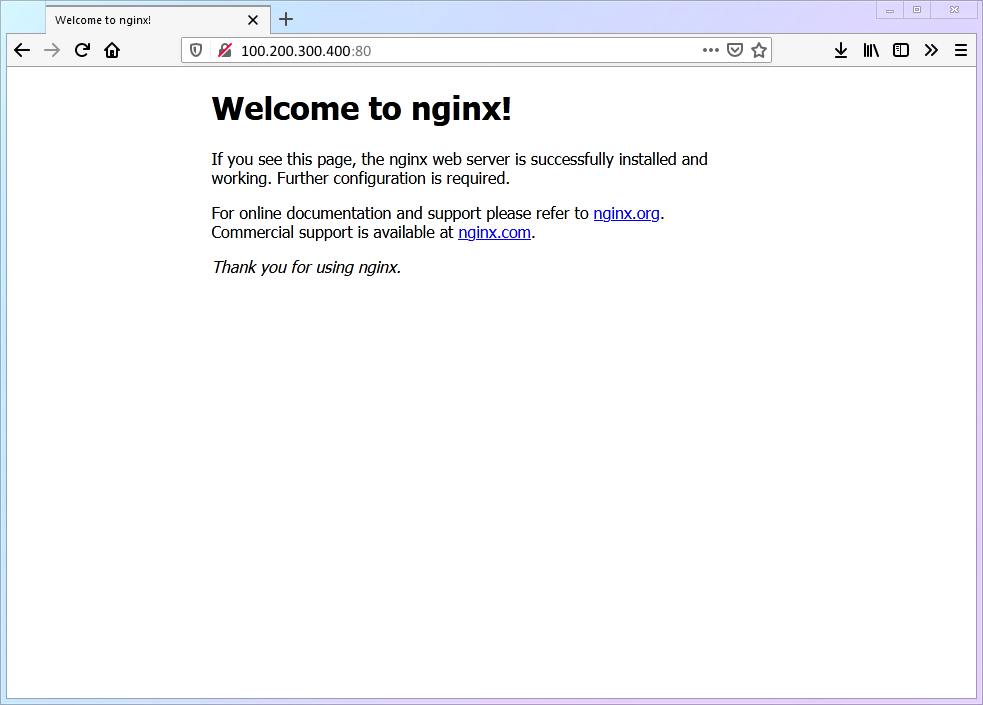
完成后,Nginx 已经自动运行。此时打开 Windows 上的浏览器并输入
http://100.200.300.400:80,若看到下图的界面就说明 Nginx 已经正常在运行了。 -
如果无法看到上述Nginx默认页面,可能是需要配置Debian系统上默认的防火墙组件Uncomplicated Firewall (UFW),以便启用 HTTP (80) 和 HTTPS (443) 端口流量。
a. 验证方法,输入:
sudo ufw statusb. 如果输出如下,表明80和433端口未开启,需要执行c步骤
Status: active
To                         Action      From
--                         ------      ----
22/tcp                     ALLOW       Anywhere
22/tcp (v6)                ALLOW       Anywhere (v6)
c. 启用UFW的Nginx 80 和 443 端口命令
sudo ufw allow 'Nginx Full'd. 输入a中命令再次验证,如果输出如下,表示Nginx流量已经被防火墙放行,这样就应该可以看到前述第2点中的Nginx默认页面。
Status: active
To                         Action      From
--                         ------      ----
22/tcp                     ALLOW       Anywhere
Nginx Full                 ALLOW       Anywhere
22/tcp (v6)                ALLOW       Anywhere (v6)
Nginx Full (v6)            ALLOW       Anywhere (v6)
5.3 创建一个最简单的网页
-
小小白白 Linux 基础命令:
编号 命令名称 命令说明 cmd-10mkdir新建文件夹 cmd-11systemctl reload重新加载某个服务 -
小小白白 Linux 基础配置文件:
编号 配置文件位置 文件说明 conf-02/etc/nginx/nginx.confNginx 程序设置 -
创建一个网站专用的文件夹
/home/vpsadmin/www/webpage/并建立网页文件index.htmlmkdir -p ~/www/webpage/ && nano ~/www/webpage/index.html
::: warning
如果你用的不是 vpsadmin 这个用户名,请务必理解这条命令中 “~” 符号的意义(这关系到【第 5 步】你要写的内容):
- 如果是 【非
root用户】,“~”就等价于/home/用户名 - 如果是 【
root用户】,“~”就等价于/root:::
-
把下面的内容完整的复制进去,然后保存(
ctrl+o)退出(ctrl+x)<html lang=""> <!-- Text between angle brackets is an HTML tag and is not displayed. Most tags, such as the HTML and /HTML tags that surround the contents of a page, come in pairs; some tags, like HR, for a horizontal rule, stand alone. Comments, such as the text you're reading, are not displayed when the Web page is shown. The information between the HEAD and /HEAD tags is not displayed. The information between the BODY and /BODY tags is displayed.--> <head> <title>Enter a title, displayed at the top of the window.</title> </head> <!-- The information between the BODY and /BODY tags is displayed.--> <body> <h1>Enter the main heading, usually the same as the title.</h1> <p>Be <b>bold</b> in stating your key points. Put them in a list:</p> <ul> <li>The first item in your list</li> <li>The second item; <i>italicize</i> key words</li> </ul> <p>Improve your image by including an image.</p> <p> <img src="https://i.imgur.com/SEBww.jpg" alt="A Great HTML Resource" /> </p> <p> Add a link to your favorite <a href="https://www.dummies.com/">Web site</a>. Break up your page with a horizontal rule or two. </p> <hr /> <p> Finally, link to <a href="page2.html">another page</a> in your own Web site. </p> <!-- And add a copyright notice.--> <p>© Wiley Publishing, 2011</p> </body> </html>赋予其他用户读取该文件的权限
chmod -R a+r . -
修改
nginx.conf并重启Nginx服务,将80端口的 http 访问定位到刚才建立的html页面上-
修改
nginx.conf。sudo nano /etc/nginx/nginx.conf -
将下面一段,添加在
http{}内,然后保存(ctrl+o)退出(ctrl+x)。(记得将域名替换为之前准备好的、包含二级域名的真实域名)server { listen 80; server_name 二级域名.你的域名.com; root /home/vpsadmin/www/webpage; index index.html; }::: warning 特别注意! 如我在【第 3 步】中的提示所说,请务必确保
/home/vpsadmin/www/webpage改成你的实际文件路径。 ::: -
让
nginx重新载入配置使其生效sudo systemctl reload nginx -
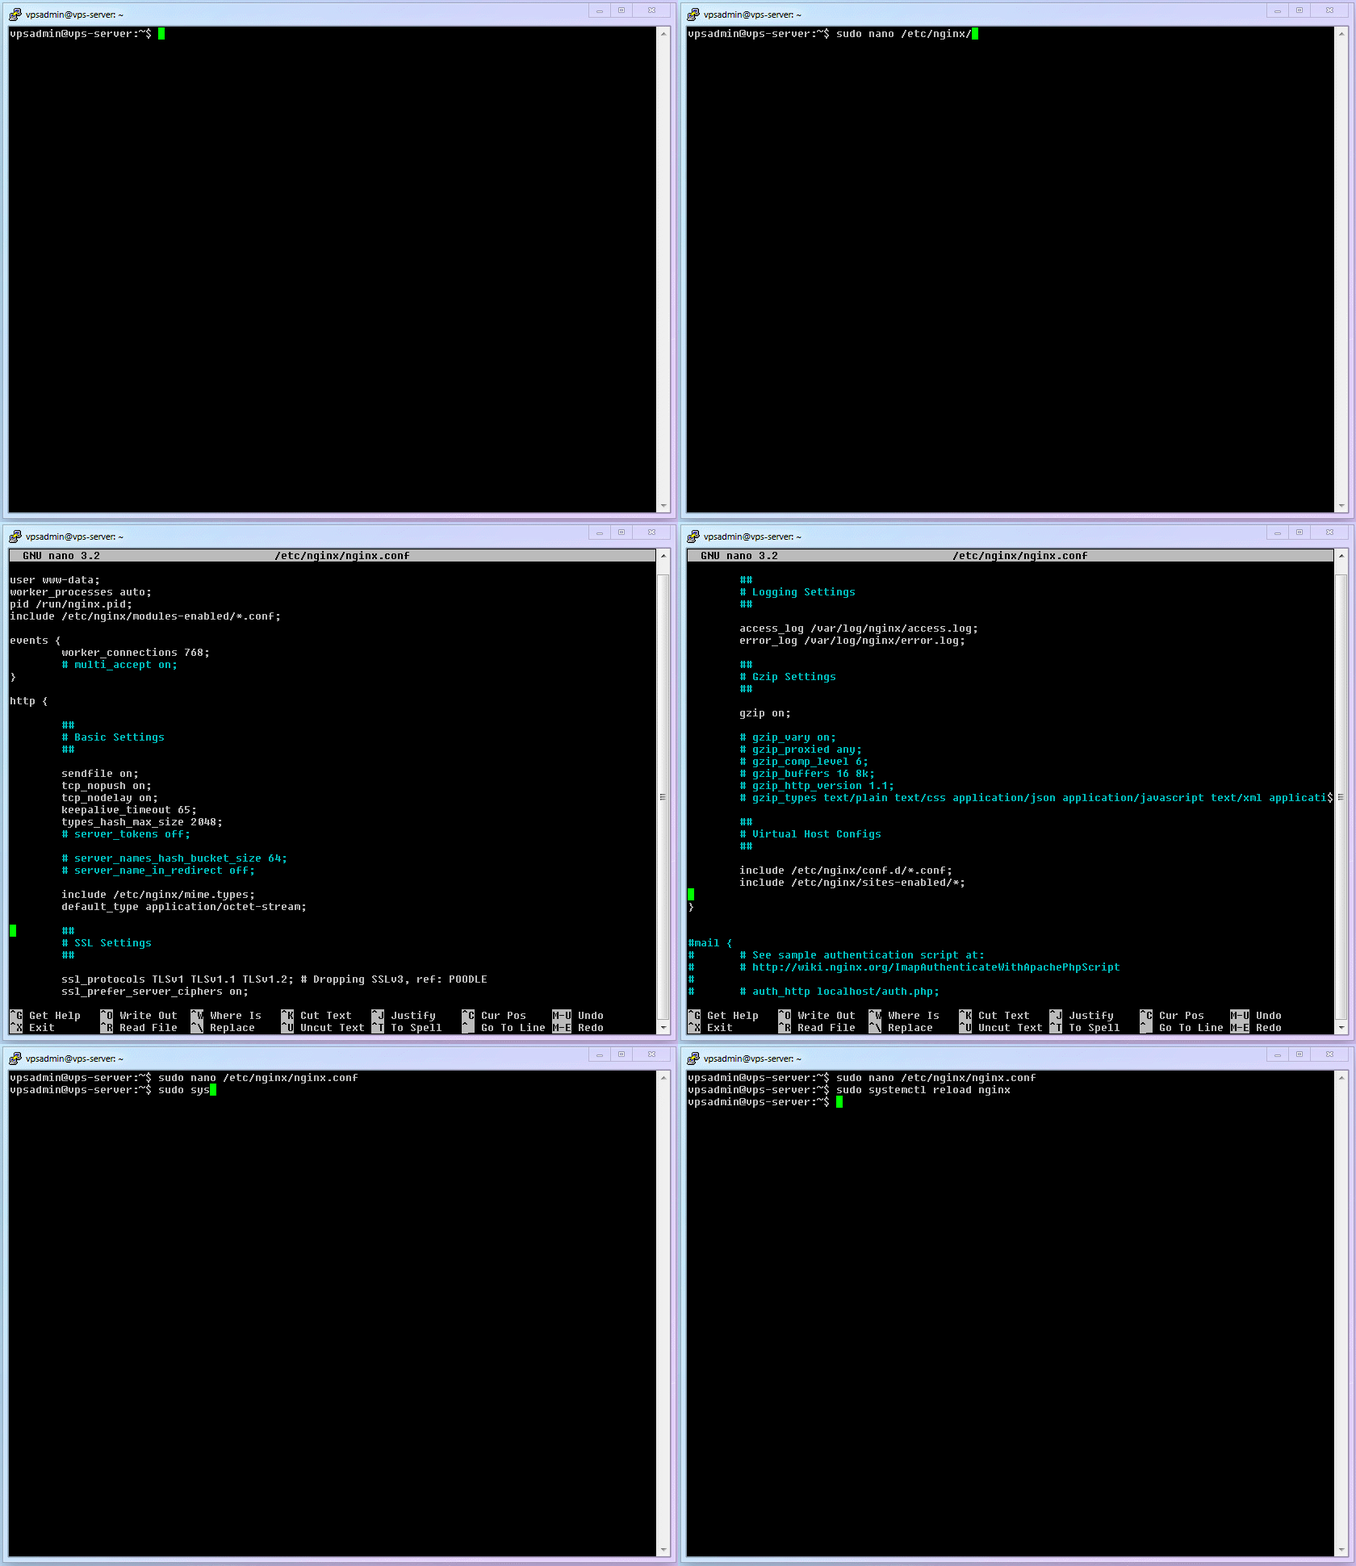
完整的设置流程如下:
-
此时如果你访问
http://二级域名.你的域名.com,你看到这样的页面则说明成功:
-
5.4 常见错误的说明
首先,如果你一路按照文章的说明来操作,并且足够细心,那肯定不会出错。所以,我并不打算修改本文的写法。
那为什么依然有很多同学卡在了这一步,网页怎么也打不开呢?基本上就是两个字:粗心。因为这里配置可能出现的问题只有两种,原因也只有两个。
一、两种问题:
nginx.conf里面的/home/vpsadmin/www/webpage这一条,与你的实际文件路径不符,nginx找不到文件- 路径正确,但
nginx无权读取
二、两个原因:
- 使用了【非
root用户】,但仍然直接拷贝文中的命令不加修改。(这基本就等于抄答案时把同学的名字一起抄过去了) - 坚持使用【
root用户】
碰到错误的同学,就回过头仔细看一下【5.3】中【第 3 步】和【第 5-2 步】的说明吧。
::: warning
本文前期已经用了大量篇幅说明了使用【非 root 用户】对安全的重要性,全文也是基于此而写。所以,因使用【 root 用户】而导致的问题并不在本文的设计范围里。
但我相信,坚持使用【 root 用户】的同学应该是有主见、动手能力强、或者有一定 Linux 基础的同学。问题的症结我已经全部说明了,我相信你一定可以自行解决。
:::
5.5 你的进度
至此,Xray 的第一个基础设施【网页】已经就位,我们马上就进入第二个基础设施【证书】吧!
⬛⬛⬛⬛⬛⬜⬜⬜ 62.5%


