|
|
||
|---|---|---|
| .. | ||
| auto_parallel | ||
| hybrid_parallel | ||
| large_batch_optimizer | ||
| opt | ||
| sequence_parallel | ||
| stable_diffusion | ||
| .gitignore | ||
| README.md | ||
| download_cifar10.py | ||
README.md
Colossal-AI Tutorial Hands-on
Introduction
Welcome to the Colossal-AI tutorial, which has been accepted as official tutorials by top conference SC, AAAI, PPoPP, etc.
Colossal-AI, a unified deep learning system for the big model era, integrates many advanced technologies such as multi-dimensional tensor parallelism, sequence parallelism, heterogeneous memory management, large-scale optimization, adaptive task scheduling, etc. By using Colossal-AI, we could help users to efficiently and quickly deploy large AI model training and inference, reducing large AI model training budgets and scaling down the labor cost of learning and deployment.
🚀 Quick Links
Colossal-AI | Paper | Documentation | Forum | Slack
Table of Content
- Multi-dimensional Parallelism
- Know the components and sketch of Colossal-AI
- Step-by-step from PyTorch to Colossal-AI
- Try data/pipeline parallelism and 1D/2D/2.5D/3D tensor parallelism using a unified model
- Sequence Parallelism
- Try sequence parallelism with BERT
- Combination of data/pipeline/sequence parallelism
- Faster training and longer sequence length
- Large Batch Training Optimization
- Comparison of small/large batch size with SGD/LARS optimizer
- Acceleration from a larger batch size
- Auto-Parallelism
- Parallelism with normal non-distributed training code
- Model tracing + solution solving + runtime communication inserting all in one auto-parallelism system
- Try single program, multiple data (SPMD) parallel with auto-parallelism SPMD solver on ResNet50
- Fine-tuning and Serving for OPT
- Try pre-trained OPT model weights with Colossal-AI
- Fine-tuning OPT with limited hardware using ZeRO, Gemini and parallelism
- Deploy the fine-tuned model to inference service
- Acceleration of Stable Diffusion
- Stable Diffusion with Lightning
- Try Lightning Colossal-AI strategy to optimize memory and accelerate speed
Discussion
Discussion about the Colossal-AI project is always welcomed! We would love to exchange ideas with the community to better help this project grow. If you think there is a need to discuss anything, you may jump to our Slack.
If you encounter any problem while running these tutorials, you may want to raise an issue in this repository.
🛠️ Setup environment
You should use conda to create a virtual environment, we recommend python 3.8, e.g. conda create -n colossal python=3.8. This installation commands are for CUDA 11.3, if you have a different version of CUDA, please download PyTorch and Colossal-AI accordingly.
# install torch
# visit https://pytorch.org/get-started/locally/ to download other versions
pip install torch==1.12.1+cu113 torchvision==0.13.1+cu113 torchaudio==0.12.1 --extra-index-url https://download.pytorch.org/whl/cu113

# install latest ColossalAI
# visit https://colossalai.org/download to download corresponding version of Colossal-AI
pip install colossalai==0.1.11rc3+torch1.12cu11.3 -f https://release.colossalai.org
You can run colossalai check -i to verify if you have correctly set up your environment 🕹️.

If you encounter messages like please install with cuda_ext, do let me know as it could be a problem of the distribution wheel. 😥
Then clone the Colossal-AI repository from GitHub.
git clone https://github.com/hpcaitech/ColossalAI.git
cd ColossalAI/examples/tutorial
🔥 Multi-dimensional Hybrid Parallel with Vision Transformer
- Go to hybrid_parallel folder in the tutorial directory.
- Install our model zoo.
pip install titans
- Run with synthetic data which is of similar shape to CIFAR10 with the
-sflag.
colossalai run --nproc_per_node 4 train.py --config config.py -s
- Modify the config file to play with different types of tensor parallelism, for example, change tensor parallel size to be 4 and mode to be 2d and run on 8 GPUs.
☀️ Sequence Parallel with BERT
- Go to the sequence_parallel folder in the tutorial directory.
- Run with the following command
export PYTHONPATH=$PWD
colossalai run --nproc_per_node 4 train.py -s
- The default config is sequence parallel size = 2, pipeline size = 1, let’s change pipeline size to be 2 and try it again.
📕 Large batch optimization with LARS and LAMB
- Go to the large_batch_optimizer folder in the tutorial directory.
- Run with synthetic data
colossalai run --nproc_per_node 4 train.py --config config.py -s
😀 Auto-Parallel Tutorial
- Go to the auto_parallel folder in the tutorial directory.
- Install
pulpandcoin-or-cbcfor the solver.
pip install pulp
conda install -c conda-forge coin-or-cbc
- Run the auto parallel resnet example with 4 GPUs with synthetic dataset.
colossalai run --nproc_per_node 4 auto_parallel_with_resnet.py -s
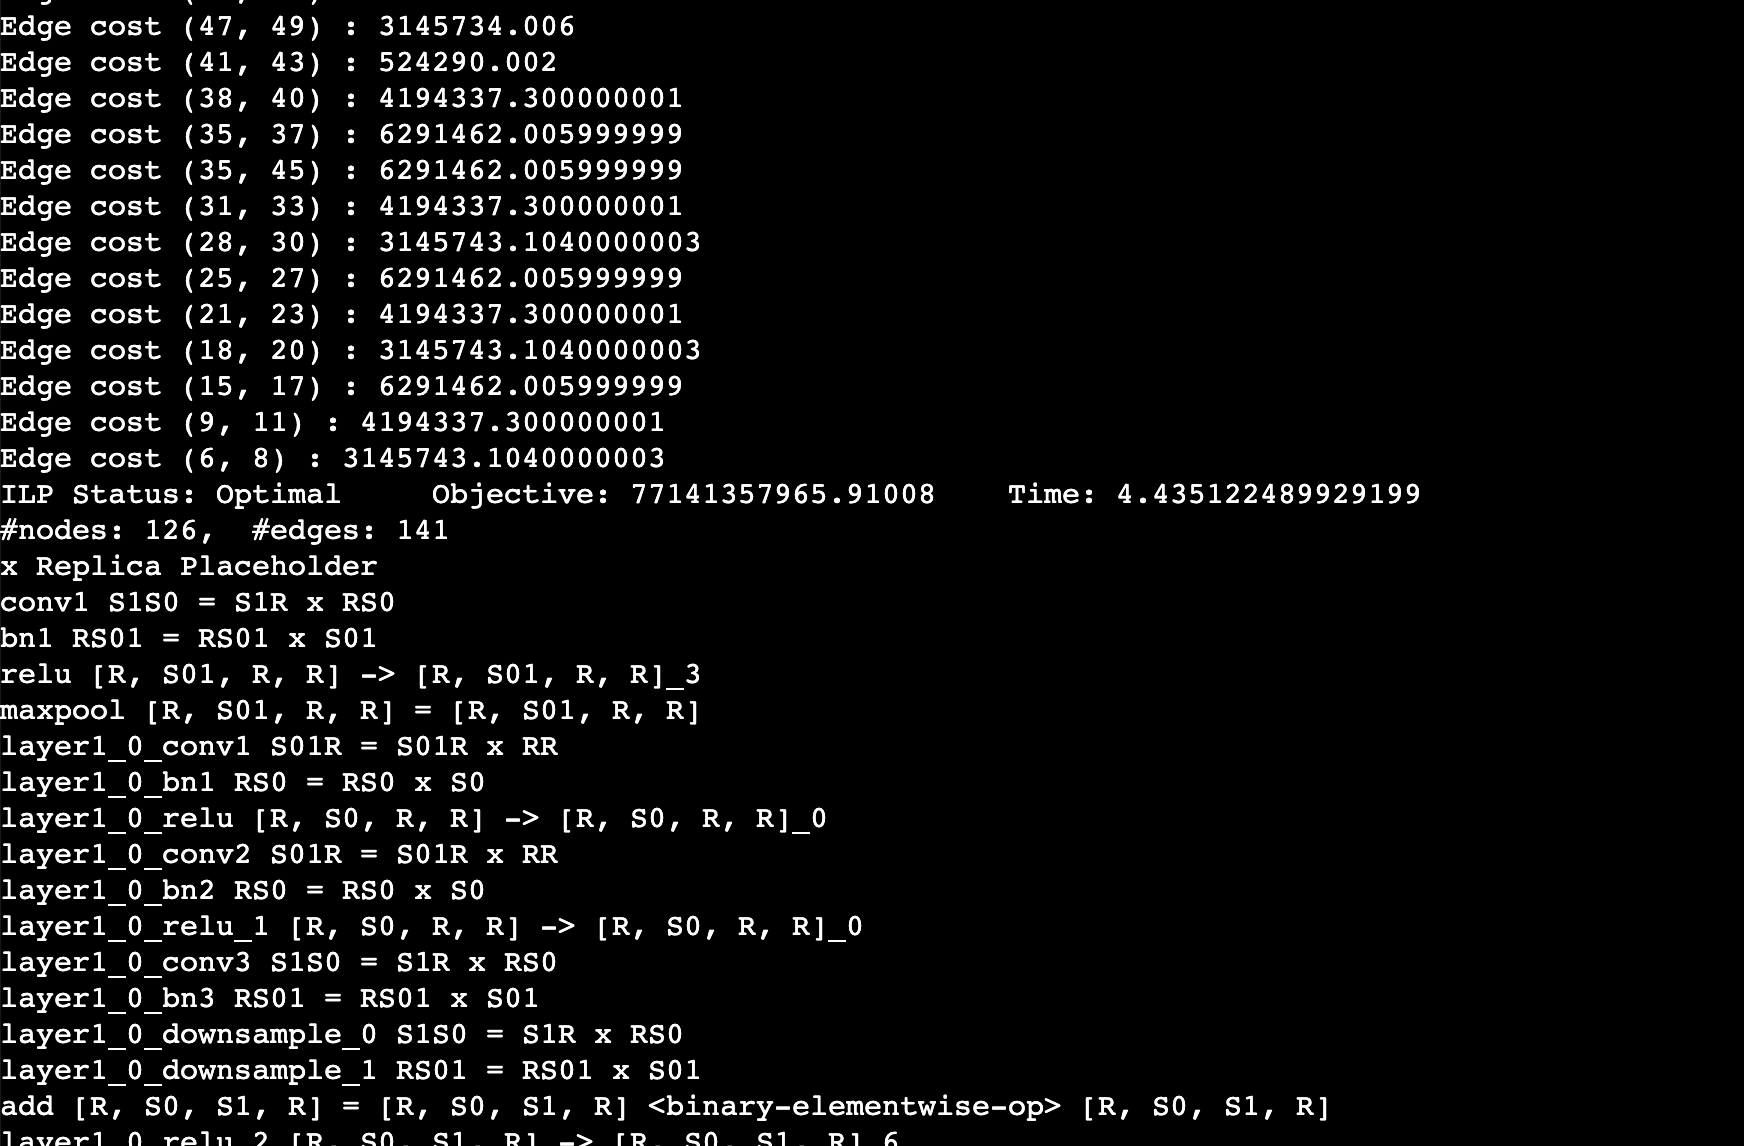
You should expect to the log like this. This log shows the edge cost on the computation graph as well as the sharding strategy for an operation. For example, layer1_0_conv1 S01R = S01R X RR means that the first dimension (batch) of the input and output is sharded while the weight is not sharded (S means sharded, R means replicated), simply equivalent to data parallel training.

🎆 Auto-Checkpoint Tutorial
- Stay in the
auto_parallelfolder. - Install the dependencies.
pip install matplotlib transformers
- Run a simple resnet50 benchmark to automatically checkpoint the model.
python auto_ckpt_solver_test.py --model resnet50
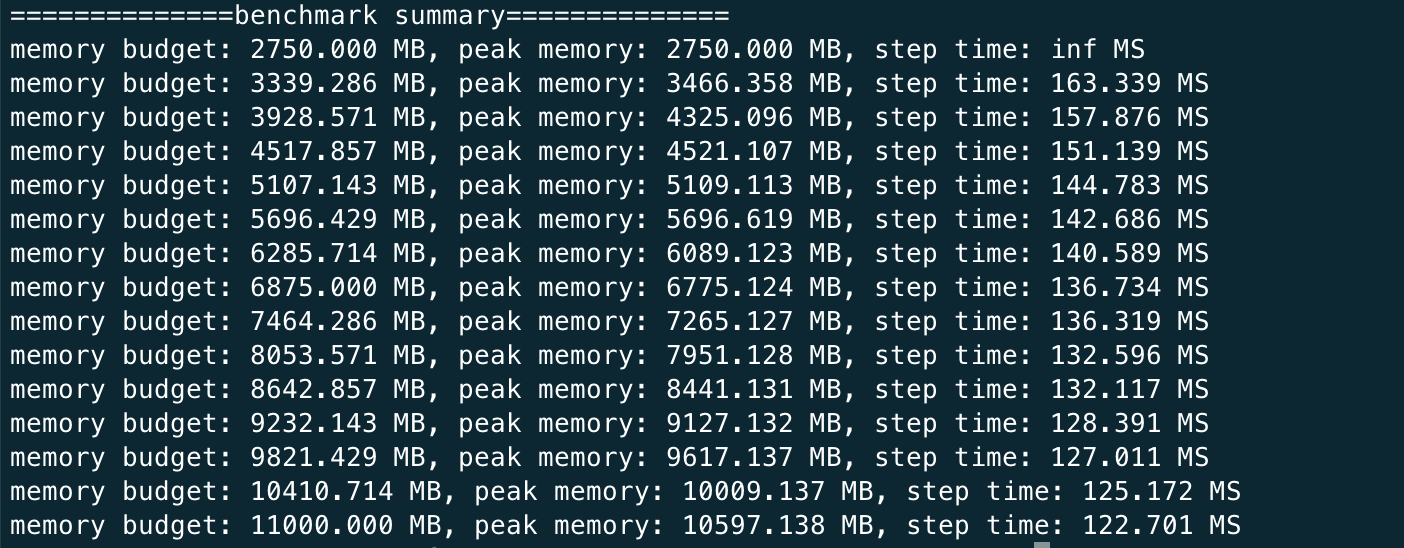
You should expect the log to be like this

This shows that given different memory budgets, the model is automatically injected with activation checkpoint and its time taken per iteration. You can run this benchmark for GPT as well but it can much longer since the model is larger.
python auto_ckpt_solver_test.py --model gpt2
- Run a simple benchmark to find the optimal batch size for checkpointed model.
python auto_ckpt_batchsize_test.py
You can expect the log to be like

🚀 Run OPT finetuning and inference
- Install the dependency
pip install datasets accelerate
- Run finetuning with synthetic datasets with one GPU
bash ./run_clm_synthetic.sh
- Run finetuning with 4 GPUs
bash ./run_clm_synthetic.sh 16 0 125m 4
- Run inference with OPT 125M
docker hpcaitech/tutorial:opt-inference
docker run -it --rm --gpus all --ipc host -p 7070:7070 hpcaitech/tutorial:opt-inference
- Start the http server inside the docker container with tensor parallel size 2
python opt_fastapi.py opt-125m --tp 2 --checkpoint /data/opt-125m
🖼️ Accelerate Stable Diffusion with Colossal-AI
- Create a new environment for diffusion
conda env create -f environment.yaml
conda activate ldm
- Install Colossal-AI from our official page
pip install colossalai==0.1.10+torch1.11cu11.3 -f https://release.colossalai.org
- Install PyTorch Lightning compatible commit
git clone https://github.com/Lightning-AI/lightning && cd lightning && git reset --hard b04a7aa
pip install -r requirements.txt && pip install .
cd ..
- Comment out the
from_pretrainedfield in thetrain_colossalai_cifar10.yaml. - Run training with CIFAR10.
python main.py -logdir /tmp -t true -postfix test -b configs/train_colossalai_cifar10.yaml