# Examples
## Table of Contents
- [Examples](#examples)
- [Table of Contents](#table-of-contents)
- [Install Requirements](#install-requirements)
- [Get Start with ColossalRun](#get-start-with-colossalrun)
- [Training Configuration](#training-configuration)
- [Parameter Efficient Finetuning (PEFT)](#parameter-efficient-finetuning-peft)
- [RLHF Stage 1: Supervised Instruction Tuning](#rlhf-training-stage1---supervised-instructs-tuning)
- [Step 1: Data Collection](#step-1-data-collection)
- [Step 2: Preprocessing](#step-2-preprocessing)
- [Step 3: Training](#step-3-training)
- [RLHF Stage 2: Training Reward Model](#rlhf-training-stage2---training-reward-model)
- [Step 1: Data Collection](#step-1-data-collection-1)
- [Step 2: Preprocessing](#step-2-preprocessing-1)
- [Step 3: Training](#step-3-training-1)
- [Features and Tricks in RM Training](#features-and-tricks-in-rm-training)
- [RLHF Stage 3: Proximal Policy Optimization](#rlhf-training-stage3---proximal-policy-optimization)
- [Step 1: Data Collection](#step-1-data-collection-2)
- [Step 2: Preprocessing](#step-2-preprocessing-2)
- [Step 3: Training](#step-3-training-3)
- [PPO Training Results](#sample-training-results-using-default-script)
- [Reward](#reward)
- [KL Divergence](#approximate-kl-divergence)
- [Note on PPO Training](#note-on-ppo-training)
- [Alternative Option For RLHF: Direct Preference Optimization](#alternative-option-for-rlhf-direct-preference-optimization)
- [DPO Stage 1: Supervised Instruction Tuning](#dpo-training-stage1---supervised-instructs-tuning)
- [DPO Stage 2: DPO Training](#dpo-training-stage2---dpo-training)
- [Alternative Option For RLHF: Simple Preference Optimization](#alternative-option-for-rlhf-simple-preference-optimization)
- [Alternative Option For RLHF: Kahneman-Tversky Optimization (KTO)](#alternative-option-for-rlhf-kahneman-tversky-optimization-kto)
- [Alternative Option For RLHF: Odds Ratio Preference Optimization](#alternative-option-for-rlhf-odds-ratio-preference-optimization)
- [List of Supported Models](#list-of-supported-models)
- [Hardware Requirements](#hardware-requirements)
- [Inference example](#inference-example)
- [Attention](#attention)
---
## Install requirements
```shell
pip install -r requirements.txt
```
## Get Start with ColossalRun
You can use colossalai run to launch multi-node training:
```
colossalai run --nproc_per_node YOUR_GPU_PER_NODE --hostfile YOUR_HOST_FILE \
train.py --OTHER_CONFIGURATIONS
```
Here is a sample hostfile:
```
hostname1
hostname2
hostname3
hostname4
```
Make sure the master node can access all nodes (including itself) by ssh without a password. Here are some other arguments.
- nnodes: number of nodes used in the training
- nproc-per-node: specifies the number of processes to be launched per node
- rdzv-endpoint: address of the host node
### Training Configuration
This section gives a simple introduction on different training strategies that you can use and how to use them with our boosters and plugins to reduce training time and VRAM consumption. For more details regarding training strategies, please refer to [here](https://colossalai.org/docs/concepts/paradigms_of_parallelism). For details regarding boosters and plugins, please refer to [here](https://colossalai.org/docs/basics/booster_plugins).
Gemini (Zero3)
This plugin implements Zero-3 with chunk-based and heterogeneous memory management. It can train large models without much loss in speed. It also does not support local gradient accumulation. More details can be found in [Gemini Doc](https://colossalai.org/docs/features/zero_with_chunk).
Below shows how to use the gemini in SFT training.
```
colossalai run --nproc_per_node 4 --master_port 28534 --hostfile ./hostfile train_sft.py \
--pretrain $PRETRAINED_MODEL_PATH \
--tokenizer_dir $PRETRAINED_TOKENIZER_PATH \
--dataset ${dataset[@]} \
--save_interval 5000 \
--save_path $SAVE_DIR \
--config_file $CONFIG_FILE \
--plugin gemini \
--batch_size 4 \
--max_epochs 1 \
--accumulation_steps 1 \ # the gradient accumulation has to be disabled
--lr 2e-5 \
--max_len 2048 \
--use_wandb
```
Gemini-Auto (Zero3 with Auto-Resource-Allocation-Policy)
This option uses gemini and will automatically offload tensors with low priority to cpu. It also does not support local gradient accumulation. More details can be found in [Gemini Doc](https://colossalai.org/docs/features/zero_with_chunk).
Below shows how to use the gemini-auto in SFT training.
```
colossalai run --nproc_per_node 4 --master_port 28534 --hostfile ./hostfile train_sft.py \
--pretrain $PRETRAINED_MODEL_PATH \
--tokenizer_dir $PRETRAINED_TOKENIZER_PATH \
--dataset ${dataset[@]} \
--save_interval 5000 \
--save_path $SAVE_DIR \
--config_file $CONFIG_FILE \
--plugin gemini_auto \
--batch_size 4 \
--max_epochs 1 \
--accumulation_steps 1 \ # the gradient accumulation has to be disabled
--lr 2e-5 \
--max_len 2048 \
--use_wandb
```
Zero2
This option will distribute the optimizer parameters and the gradient to multiple GPUs and won't offload weights to cpu. It uses reduce and gather to synchronize gradients and weights. It does not support local gradient accumulation. Though you can accumulate gradients if you insist, it cannot reduce communication cost. That is to say, it's not a good idea to use Zero-2 with pipeline parallelism.
Below shows how to use the zero2 in SFT training.
```
colossalai run --nproc_per_node 4 --master_port 28534 --hostfile ./hostfile train_sft.py \
--pretrain $PRETRAINED_MODEL_PATH \
--tokenizer_dir $PRETRAINED_TOKENIZER_PATH \
--dataset ${dataset[@]} \
--save_interval 5000 \
--save_path $SAVE_DIR \
--config_file $CONFIG_FILE \
--plugin zero2 \
--batch_size 4 \
--max_epochs 1 \
--accumulation_steps 4 \
--lr 2e-5 \
--max_len 2048 \
--use_wandb
```
Zero2CPU
This option will distribute the optimizer parameters and the gradient to multiple GPUs as well as offload parameters to cpu. It does not support local gradient accumulation. Though you can accumulate gradients if you insist, it cannot reduce communication cost.
Below shows how to use the zero2-cpu in SFT training.
```
colossalai run --nproc_per_node 4 --master_port 28534 --hostfile ./hostfile train_sft.py \
--pretrain $PRETRAINED_MODEL_PATH \
--tokenizer_dir $PRETRAINED_TOKENIZER_PATH \
--dataset ${dataset[@]} \
--save_interval 5000 \
--save_path $SAVE_DIR \
--config_file $CONFIG_FILE \
--plugin zero2_cpu \
--batch_size 4 \
--max_epochs 1 \
--accumulation_steps 4 \
--lr 2e-5 \
--max_len 2048 \
--use_wandb
```
Tensor Parallelism
This option supports Tensor Parallelism (TP). Note that if you want to use TP, TP split large model weights/optimizer parameters/gradients into multiple small ones and distributes them to multiple GPUs, hence it is recommended to use TP when your model is large (e.g. 20B and above) or your training algorithm consumes a lot of memory (e.g. PPO). Currently, we have added support for TP for the following model architectures.
```
bert, LLaMA, T5, GPT2, GPT-J, OPT, Bloom, Whisper, Sam, Blip2, ChatGLM (up to ChatGLM2), Falcon, Qwen2
```
Below shows how to use the TP in PPO training.
```
colossalai run --nproc_per_node 4 --hostfile hostfile --master_port 30039 train_ppo.py \
--pretrain $PRETRAINED_MODEL_PATH \
--rm_pretrain $PRETRAINED_MODEL_PATH \
--tokenizer_dir $PRETRAINED_TOKENIZER_PATH \
--rm_checkpoint_path $REWARD_MODEL_PATH \
--prompt_dataset ${prompt_dataset[@]} \
--pretrain_dataset ${ptx_dataset[@]} \
--ptx_batch_size 1 \
--ptx_coef 0.0 \
--plugin "3d" \
--save_interval 200 \
--save_path $SAVE_DIR \
--num_episodes 2000 \
--num_collect_steps 4 \
--num_update_steps 1 \
--experience_batch_size 8 \
--train_batch_size 4 \
--accumulation_steps 8 \
--tp 4 \ # TP size, nproc_per_node must be divisible by it
--lr 9e-6 \
--mixed_precision "bf16" \
--grad_clip 1.0 \
--weight_decay 0.01 \
--warmup_steps 100 \
--grad_checkpoint \
--use_wandb
```
Sequence Parallelism
This option supports Sequence Parallelism (SP). It is recommended to use SP when your input sequence is very long (e.g. 50K and above). Please refer to this [SP Doc](https://github.com/hpcaitech/ColossalAI/blob/b96c6390f4363f58c0df56c0ca28755f8a5f1aa2/examples/tutorial/sequence_parallel/README.md?plain=1#L1) for more information.
Below shows how to use the SP in SFT training.
```
# use the `split_gather` or `ring` sp mode
colossalai run --nproc_per_node 4 --master_port 28534 --hostfile ./hostfile train_sft.py \
--pretrain $PRETRAINED_MODEL_PATH \
--tokenizer_dir $PRETRAINED_TOKENIZER_PATH \
--dataset ${dataset[@]} \
--save_interval 5000 \
--save_path $SAVE_DIR \
--config_file $CONFIG_FILE \
--plugin 3d \
--tp 4 \ # TP size, nproc_per_node must be divisible by it
--sp 1 \ # SP size, must be 1
--sp_mode 'split_gather' \ # or 'ring'
--enable_sequence_parallelism \ # must be set
--batch_size 4 \
--max_epochs 1 \
--accumulation_steps 4 \
--lr 2e-5 \
--max_len 2048 \
--use_wandb
# use the `all_to_all` sp mode
colossalai run --nproc_per_node 4 --master_port 28534 --hostfile ./hostfile train_sft.py \
--pretrain $PRETRAINED_MODEL_PATH \
--tokenizer_dir $PRETRAINED_TOKENIZER_PATH \
--dataset ${dataset[@]} \
--save_interval 5000 \
--save_path $SAVE_DIR \
--config_file $CONFIG_FILE \
--plugin 3d \
--tp 1 \ # TP size, must be 1
--sp 4 \ # SP size, nproc_per_node must be divisible by it
--sp_mode 'all_to_all' \
--enable_sequence_parallelism \ # must be set
--batch_size 4 \
--max_epochs 1 \
--accumulation_steps 4 \
--lr 2e-5 \
--max_len 2048 \
--use_wandb
```
Advanced Training Configuration with the Hybrid Plugin
User can use our HybridParallelPlugin for more advanced policy control. Currently, we have added support for the following model architectures.
```
bert, LLaMA, T5, GPT2, GPT-J, OPT, Bloom, Whisper, Sam, Blip2, ChatGLM (up to ChatGLM2), Falcon, Qwen2
```
- We support mixing tensor parallelism with zero1/zero2/zero3:
to do that, set both `tp` and `zero_stage`
- We support mixing tensor parallelism with pipeline parallelism:
to do that, set both `tp` and `pp`
Gradient Checkpointing
This option saves VRAM consumption by selectively recomputing some of the intermediate value on-the-fly during the backward pass, rather than storing them in memory.
To enable gradient checkpointing, add --grad_checkpoint to your training script.
```
colossalai run --nproc_per_node 4 --master_port 28534 --hostfile ./hostfile train_sft.py \
--pretrain $PRETRAINED_MODEL_PATH \
--tokenizer_dir $PRETRAINED_TOKENIZER_PATH \
--dataset ${dataset[@]} \
--save_interval 5000 \
--save_path $SAVE_DIR \
--config_file $CONFIG_FILE \
--plugin zero2_cpu \
--batch_size 4 \
--max_epochs 1 \
--accumulation_steps 4 \
--lr 2e-5 \
--max_len 2048 \
--grad_checkpoint \ # This enables gradient checkpointing
--use_wandb
```
Flash Attention
Details about flash attention can be found in the paper: [FlashAttention: Fast and Memory-Efficient Exact Attention with IO-Awareness](https://arxiv.org/abs/2205.14135).
To enable flash attention, add --use_flash_attn to your training script.
```
colossalai run --nproc_per_node 4 --master_port 28534 --hostfile ./hostfile train_sft.py \
--pretrain $PRETRAINED_MODEL_PATH \
--tokenizer_dir $PRETRAINED_TOKENIZER_PATH \
--dataset ${dataset[@]} \
--save_interval 5000 \
--save_path $SAVE_DIR \
--config_file $CONFIG_FILE \
--plugin zero2_cpu \
--batch_size 4 \
--max_epochs 1 \
--accumulation_steps 4 \
--lr 2e-5 \
--max_len 2048 \
--use_flash_attn \ # This enables flash attention
--use_wandb
```
Other Training Arguments
- grad_clip: gradients larger than this value will be clipped.
- weight_decay: weight decay hyper-parameter.
- warmup_steps: number of warmup steps used in setting up the learning rate scheduler.
- pretrain: pretrain model path, weights will be loaded from this pretrained model unless checkpoint_path is provided.
- tokenizer_dir: specify where to load the tokenizer, if not provided, tokenizer will be loaded from the pretrained model path.
- dataset: a list of strings, each is a path to a folder containing buffered dataset files in arrow format.
- checkpoint_path: if provided, will load weights from the checkpoint_path.
- config_file: path to store the training config file.
- save_dir: path to store the model checkpoints.
- max_length: input will be padded/truncated to max_length before feeding to the model.
- max_epochs: number of epochs to train.
- disable_loss_mask: whether to use the loss mask to mask the loss or not. For example, in SFT, if the loss mask is disabled, the model will compute the loss across all tokens in the sequence, if the loss mask is applied, only tokens correspond to the assistant responses will contribute to the final loss.
- batch_size: training batch size.
- mixed_precision: precision to use in training. Support 'fp16' and 'bf16'. Note that some devices may not support the 'bf16' option, please refer to [Nvidia](https://developer.nvidia.com/) to check compatibility.
- save_interval: save the model weights as well as optimizer/scheduler states every save_interval steps/episodes.
- merge_lora_weights: whether to merge lora weights before saving the model
- lr: the learning rate used in training.
- accumulation_steps: accumulate gradient every accumulation_steps.
- log_dir: path to store the log.
- use_wandb: if this flag is up, you can view logs on wandb.
Low Rank Adaption and PiSSA
Details about Low Rank Adaption (LoRA) can be found in the paper: [LoRA: Low-Rank Adaptation of Large Language Models](https://arxiv.org/abs/2106.09685). Details about Principal Singular Values and Singular Vectors Adaptation (PiSSA) can be found in the paper: [PiSSA: Principal Singular Values and Singular Vectors Adaptation of Large Language Models](https://arxiv.org/abs/2404.02948). Both help to reduce the running-time VRAM consumption as well as timing at the cost of overall model performance. It is suitable for training LLM with constrained resources.
To use LoRA/PiSSA in training, please create a config file as in the following example and set the `--lora_config` to that configuration file.
```json
{
"r": 128,
"embedding_lora_dropout": 0.0,
"linear_lora_dropout": 0.1,
"lora_alpha": 32,
"lora_train_bias": "all",
"lora_initialization_method": "PiSSA",
"target_modules": ["q_proj", "o_proj", "k_proj", "v_proj", "gate_proj", "up_proj", "down_proj", "embed_tokens"]
}
```
#### Lora Parameters
- r: lora rank
- embedding_lora_dropout: dropout probability for embedding layer
- linear_lora_dropout: dropout probability for linear layer
- lora_alpha: lora alpha, controls how much the adaptor can deviate from the pretrained model.
- lora_train_bias: whether to add trainable bias to lora layers, choose from "all" (all layers (including but not limited to lora layers) will have trainable biases), "none" (no trainable biases), "lora" (only lora layers will have trainable biases)
- lora_initialization_method: how to initialize lora weights, choose one from ["kaiming_uniform", "PiSSA"], default to "kaiming_uniform". Use "kaiming_uniform" for standard LoRA and "PiSSA" for PiSSA.
- target_modules: which module(s) should be converted to lora layers, if the module's name contain the keywords in target modules and the module is a linear or embedding layer, the module will be converted. Otherwise, the module will be frozen. Setting this field to None will automatically convert all linear and embedding layer to their LoRA counterparts. Note that this example only works for LLaMA, for other models, you need to modify it.
```
colossalai run --nproc_per_node 4 --master_port 28534 --hostfile ./hostfile train_sft.py \
--pretrain $PRETRAINED_MODEL_PATH \
--tokenizer_dir $PRETRAINED_TOKENIZER_PATH \
--dataset ${dataset[@]} \
--save_interval 5000 \
--save_path $SAVE_DIR \
--config_file $CONFIG_FILE \
--plugin zero2_cpu \
--batch_size 4 \
--max_epochs 1 \
--accumulation_steps 4 \
--lr 2e-5 \
--max_len 2048 \
--lora_config /PATH/TO/THE/LORA/CONFIG/FILE.json \ # Setting this enables LoRA
--use_wandb
```
A chat between a curious human and an artificial intelligence assistant. The assistant gives helpful, detailed, and polite answers to the human's questions.
Human: what are some pranks with a pen i can do? Assistant: Are you looking for practical joke ideas?
...
```
#### Step 3: Training
Choose a suitable model architecture for your task. Note that your model should be compatible with the tokenizer that you used to tokenize the SFT dataset. You can run [train_sft.sh](./training_scripts/train_sft.sh) to start a supervised instructs fine-tuning. Please refer to the [training configuration](#training-configuration) section for details regarding supported training options.
### RLHF Training Stage2 - Training Reward Model
Stage2 trains a reward model, which obtains corresponding scores by manually ranking different outputs for the same prompt and supervises the training of the reward model.
#### Step 1: Data Collection
Below shows the preference dataset format used in training the reward model.
```json
[
{"context": [
{
"from": "user",
"content": "Introduce butterflies species in Oregon."
}
]
"chosen": [
{
"from": "assistant",
"content": "About 150 species of butterflies live in Oregon, with about 100 species are moths..."
},
...
],
"rejected": [
{
"from": "assistant",
"content": "Are you interested in just the common butterflies? There are a few common ones which will be easy to find..."
},
...
]
},
...
]
```
#### Step 2: Preprocessing
Similar to the second step in the previous stage, we format the reward data into the same structured format as used in step 2 of the SFT stage. You can run [prepare_preference_dataset.sh](./data_preparation_scripts/prepare_preference_dataset.sh) to prepare the preference data for reward model training.
#### Step 3: Training
You can run [train_rm.sh](./training_scripts/train_rm.sh) to start the reward model training. Please refer to the [training configuration](#training-configuration) section for details regarding supported training options.
#### Features and Tricks in RM Training
- We recommend using the [Anthropic/hh-rlhf](https://huggingface.co/datasets/Anthropic/hh-rlhf)and[rm-static](https://huggingface.co/datasets/Dahoas/rm-static) datasets for training the reward model.
- We support 2 kinds of loss function named `log_sig`(used by OpenAI) and `log_exp`(used by Anthropic).
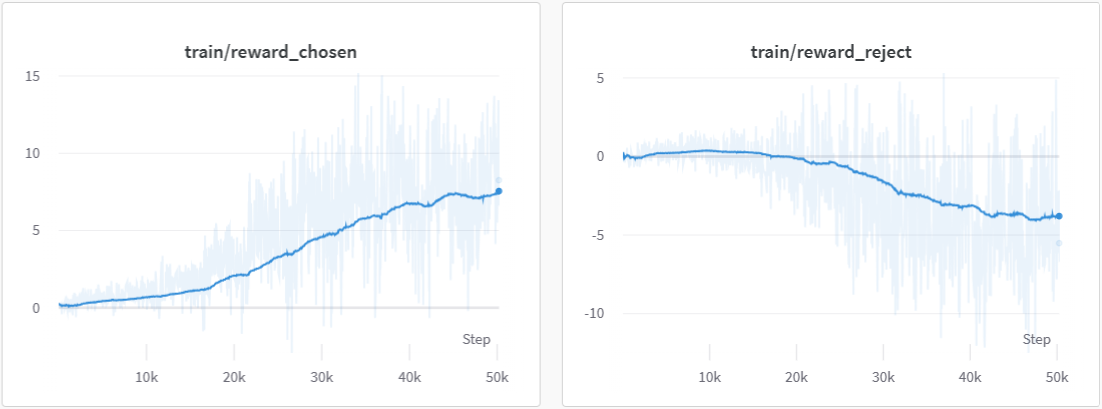
- We log the training accuracy `train/acc`, `reward_chosen` and `reward_rejected` to monitor progress during training.
- We use cosine-reducing lr-scheduler for RM training.
- We set value_head as one liner layer and initialize the weight of value_head using the N(0,1/(d_model + 1)) distribution.
#### Note on Reward Model Training
Before you move on to the next stage, please check the following list to ensure that your reward model is stable and robust. You can check the reward chart and the accuracy chart on wandb.
- The mean reward for chosen data is much higher than those for rejected data
- The accuracy is larger than 0.5 by a significant margin (usually should be greater than 0.6)
- Optional:check the reward is positive for chosen data vice versa
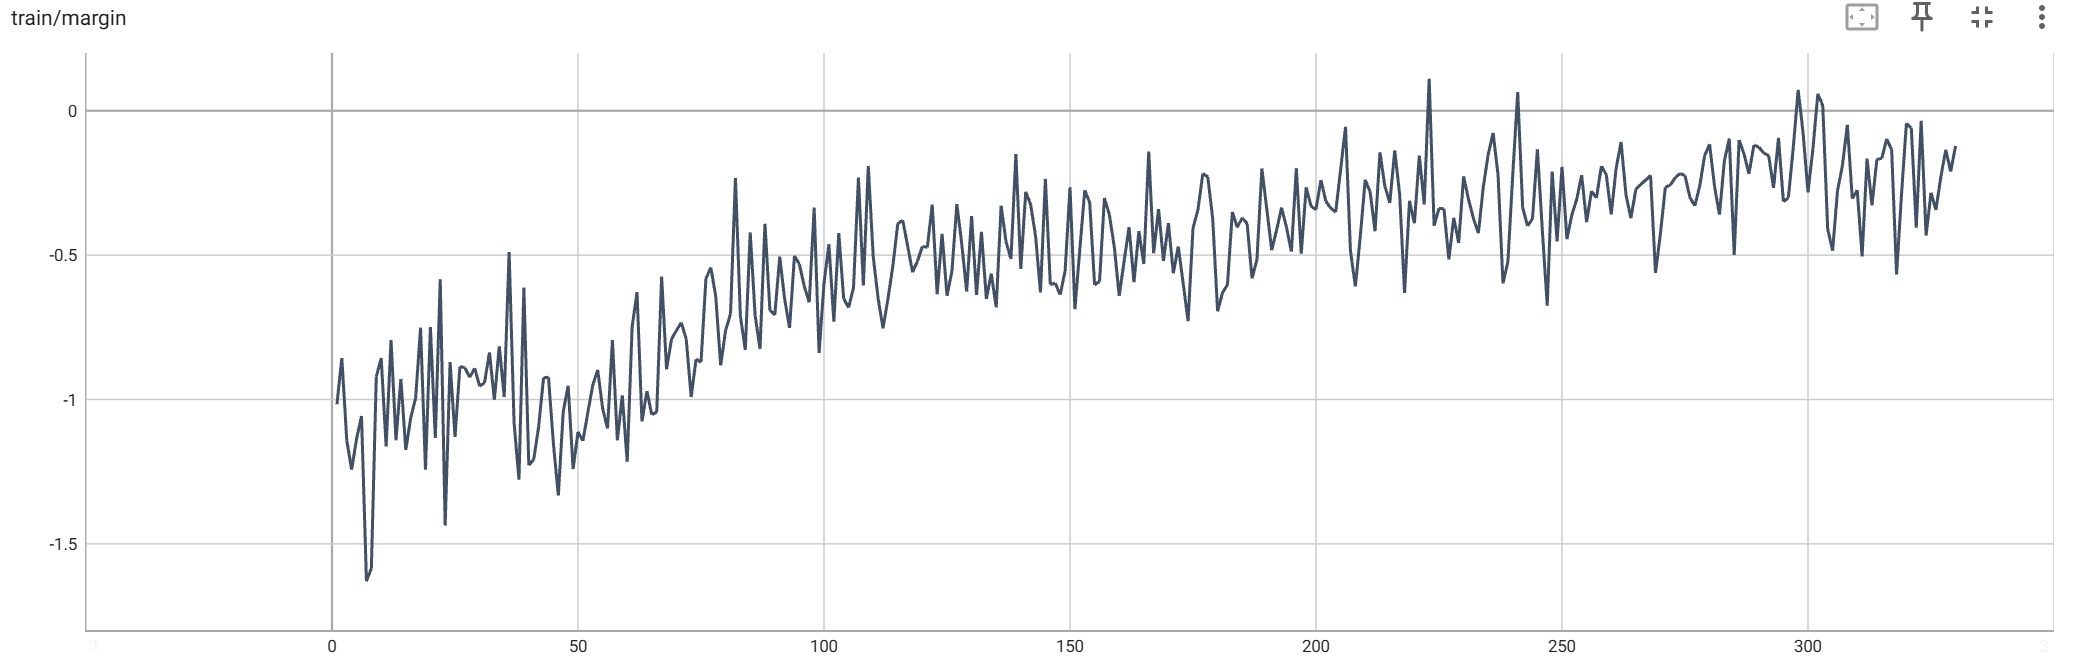
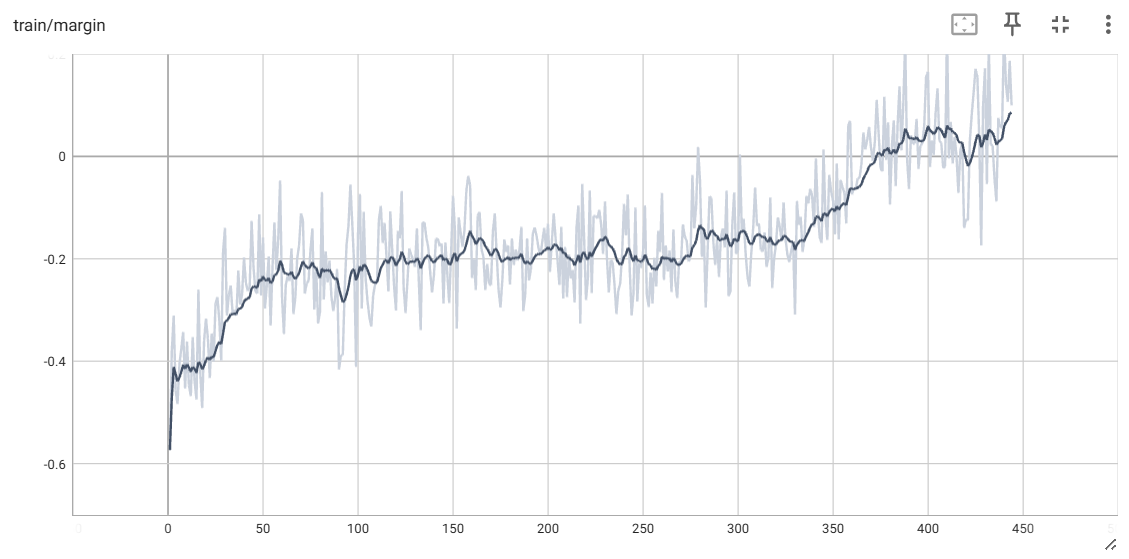
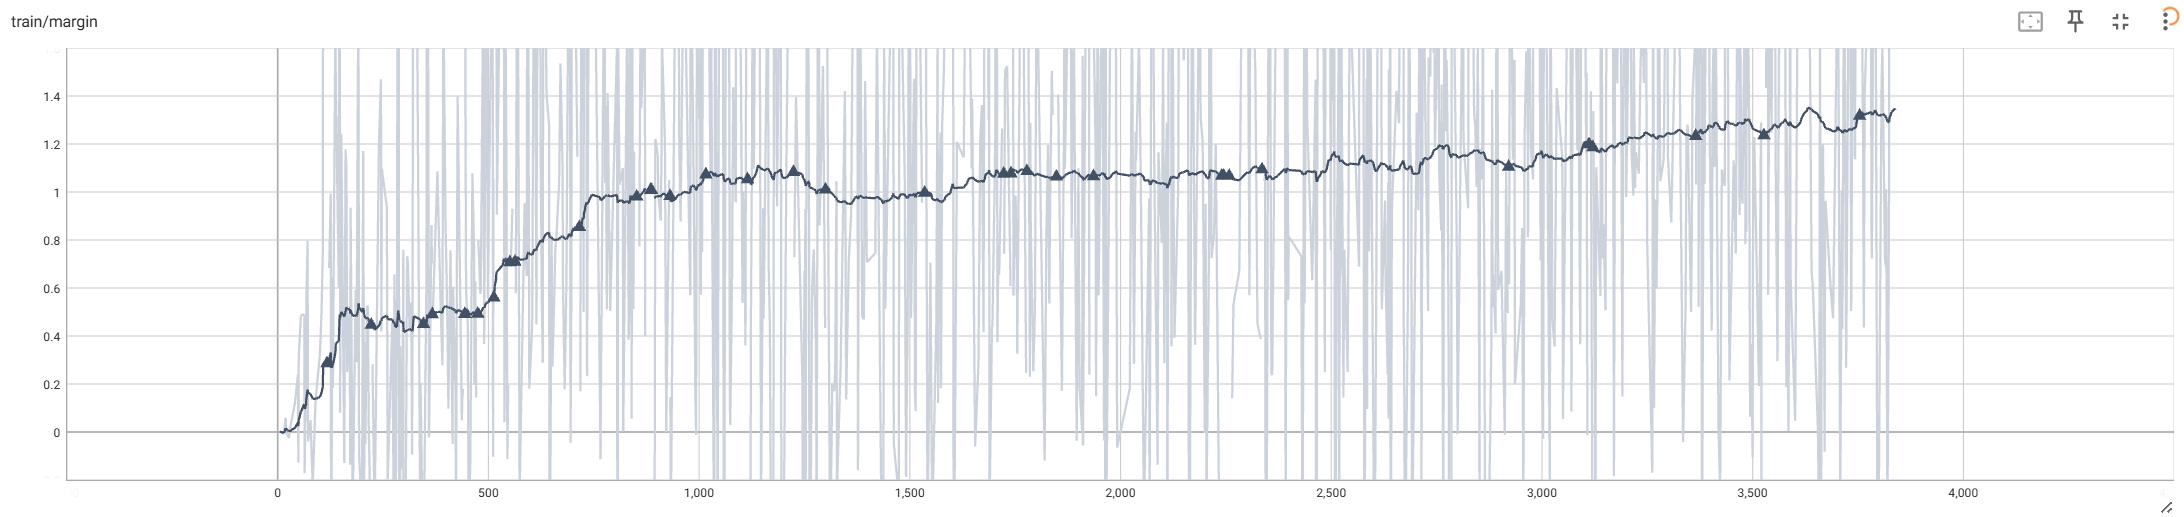
Your training reward curves should look similar to the following charts.
### RLHF Training Stage3 - Proximal Policy Optimization
In stage3 we will use reinforcement learning algorithm--- Proximal Policy Optimization (PPO), which is the most complex part of the training process:
#### Step 1: Data Collection
PPO uses two kinds of training data--- the prompt data and the pretrain data (optional). The first dataset is mandatory, data samples within the prompt dataset ends with a line from "user" and thus the "assistant" needs to generate a response to answer to the "user". Note that you can still use conversation that ends with a line from the "assistant", in that case, the last line will be dropped. Here is an example of the prompt dataset format.
```json
[
{"messages":
[
{
"from": "user",
"content": "what are some pranks with a pen i can do?"
}
...
]
},
]
```
The second dataset--- pretrained dataset is optional, provide it if you want to use the ptx loss introduced in the [InstructGPT paper](https://arxiv.org/abs/2203.02155). It follows the following format.
```json
[
{
"source": "", # system instruction
"Target": "Provide a list of the top 10 most popular mobile games in Asia\nThe top 10 most popular mobile games in Asia are:\n1) PUBG Mobile\n2) Pokemon Go\n3) Candy Crush Saga\n4) Free Fire\n5) Clash of Clans\n6) Mario Kart Tour\n7) Arena of Valor\n8) Fantasy Westward Journey\n9) Subway Surfers\n10) ARK Survival Evolved",
},
...
]
```
#### Step 2: Preprocessing
To prepare the prompt dataset for PPO training, simply run [prepare_prompt_dataset.sh](./data_preparation_scripts/prepare_prompt_dataset.sh)
You can use the SFT dataset you prepared in the SFT stage or prepare a new one from different source for the ptx dataset. The ptx data is used to calculate ptx loss, which stabilizes the training according to the [InstructGPT paper](https://arxiv.org/pdf/2203.02155.pdf).
#### Step 3: Training
You can run the [train_ppo.sh](./training_scripts/train_ppo.sh) to start PPO training. Here are some unique arguments for PPO, please refer to the training configuration section for other training configuration. Please refer to the [training configuration](#training-configuration) section for details regarding supported training options.
```bash
--pretrain $PRETRAINED_MODEL_PATH \
--rm_pretrain $PRETRAINED_MODEL_PATH \ # reward model architectural
--tokenizer_dir $PRETRAINED_TOKENIZER_PATH \
--rm_checkpoint_path $REWARD_MODEL_PATH \ # reward model checkpoint path
--prompt_dataset ${prompt_dataset[@]} \ # List of string, prompt dataset
--conversation_template_config $CONVERSATION_TEMPLATE_CONFIG_PATH \ # path to the conversation template config file
--pretrain_dataset ${ptx_dataset[@]} \ # List of string, the sft dataset
--ptx_batch_size 1 \ # batch size for calculate ptx loss
--ptx_coef 0.0 \ # none-zero if ptx loss is enable
--num_episodes 2000 \ # number of episodes to train
--num_collect_steps 1 \
--num_update_steps 1 \
--experience_batch_size 8 \
--train_batch_size 4 \
--accumulation_steps 2
```
Each episode has two phases, the collect phase and the update phase. During the collect phase, we will collect experiences (answers generated by the actor), store those in ExperienceBuffer. Then data in ExperienceBuffer is used during the update phase to update parameters of actor and critic.
- Without tensor parallelism,
```
experience buffer size
= num_process * num_collect_steps * experience_batch_size
= train_batch_size * accumulation_steps * num_process
```
- With tensor parallelism,
```
num_tp_group = num_process / tp
experience buffer size
= num_tp_group * num_collect_steps * experience_batch_size
= train_batch_size * accumulation_steps * num_tp_group
```
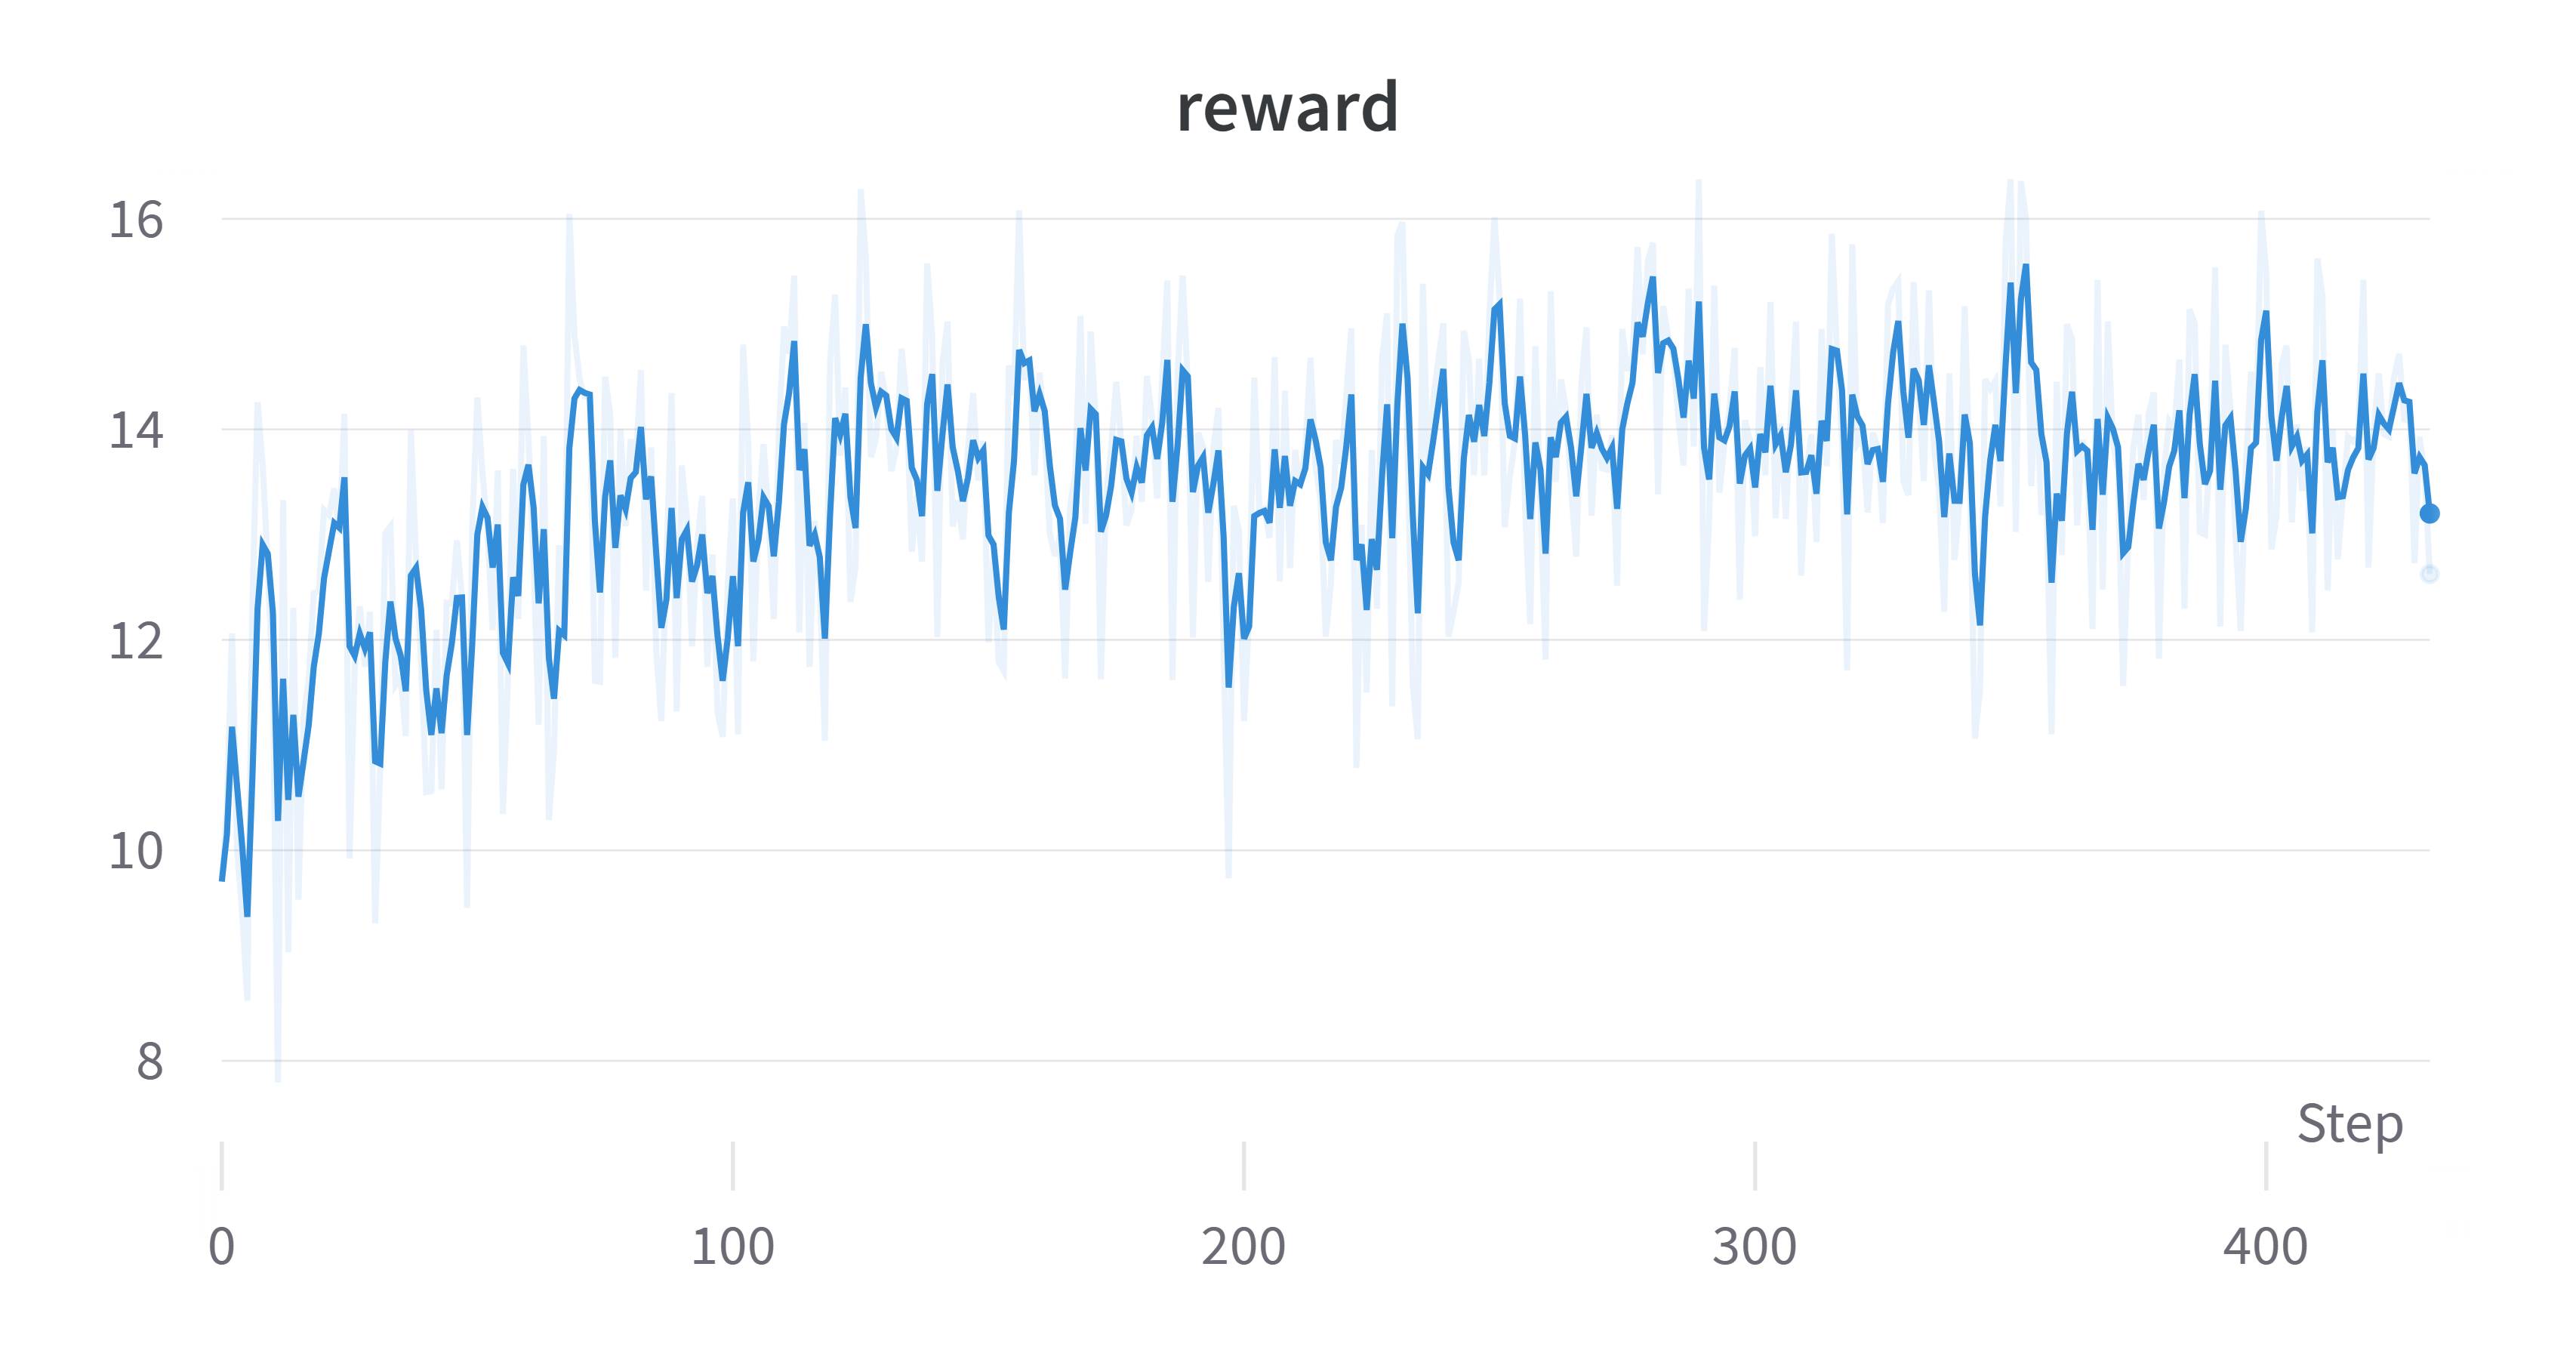
### Sample Training Results Using Default Script
#### Reward
### Note on PPO Training
#### Q1: My reward is negative
Answer: Check your reward model trained in stage 1. If the reward model only generates negative reward, we actually will expect a negative reward. However, even though the reward is negative, the reward should go up.
#### Q2: My actor loss is negative
Answer: This is normal for actor loss as PPO doesn't restrict the actor loss to be positive.
#### Q3: My reward doesn't go up (decreases)
Answer: The causes of this problem are two-fold. Check your reward model, make sure that it gives positive and strong reward for good cases and negative, strong reward for bad responses. You should also try different hyperparameter settings.
#### Q4: Generation is garbage
Answer: Yes, this happens and is well documented by other implementations. After training for too many episodes, the actor gradually deviate from its original state, which may leads to decrease in language modeling capabilities. A way to fix this is to add supervised loss during PPO. Set ptx_coef to an non-zero value (between 0 and 1), which balances PPO loss and sft loss.
## Alternative Option For RLHF: Direct Preference Optimization
For those seeking an alternative to Reinforcement Learning from Human Feedback (RLHF), Direct Preference Optimization (DPO) presents a compelling option. DPO, as detailed in the paper (available at [https://arxiv.org/abs/2305.18290](https://arxiv.org/abs/2305.18290)), DPO offers an low-cost way to perform RLHF and usually request less computation resources compares to PPO.
### DPO Training Stage1 - Supervised Instructs Tuning
Please refer the [sft section](#dpo-training-stage1---supervised-instructs-tuning) in the PPO part.
### DPO Training Stage2 - DPO Training
#### Step 1: Data Collection & Preparation
For DPO training, you only need the preference dataset. Please follow the instruction in the [preference dataset preparation section](#rlhf-training-stage2---training-reward-model) to prepare the preference data for DPO training.
#### Step 2: Training
You can run the [train_dpo.sh](./training_scripts/train_dpo.sh) to start DPO training. Please refer to the [training configuration](#training-configuration) section for details regarding supported training options. Following the trend of recent research on DPO-like alignment methods, we added option for the user to choose from, including whether to do length normalization , reward shaping and whether to use a reference model in calculating implicit reward. Here are those options,
```
--beta 0.1 \ # the temperature in DPO loss, Default to 0.1
--gamma 0.0 \ # the reward target margin in the SimPO paper, Default to 0.
--disable_reference_model \ # whether to disable the reference model, if set, the implicit reward will be calculated solely from the actor. Default to enable reference model in DPO
--length_normalization \ # whether to apply length normalization, Default to not use
```
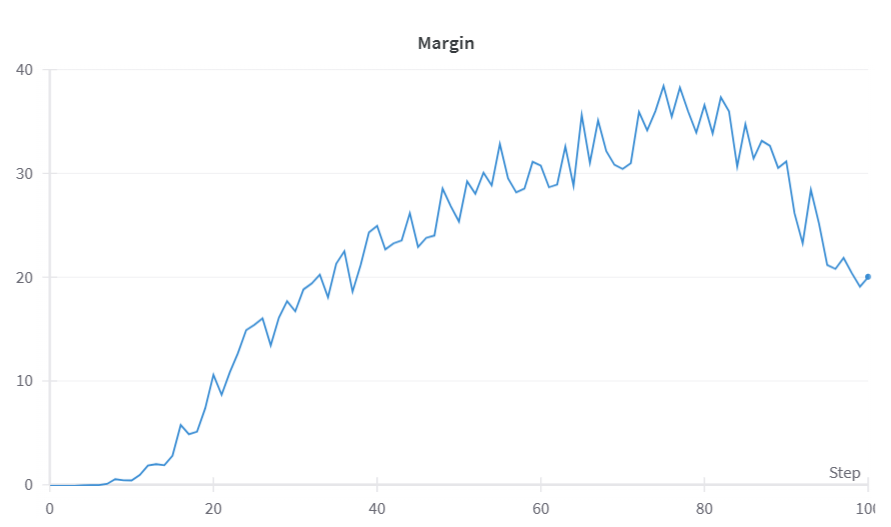
#### DPO Result
### Alternative Option For RLHF: Simple Preference Optimization
We support the method introduced in the paper [SimPO: Simple Preference Optimization
with a Reference-Free Reward](https://arxiv.org/pdf/2405.14734) (SimPO). Which is a reference model free aligment method that add length normalization and reward shaping to the DPO loss to enhance training stability and efficiency. As the method doesn't deviate too much from DPO, we add support for length normalization and SimPO reward shaping in our DPO implementation. To use SimPO in alignment, use the [train_dpo.sh](./training_scripts/train_dpo.sh) script, set the `loss_type` to `simpo_loss`, you can also set the value for temperature (`beta`) and reward target margin (`gamma`) but it is optional.
#### SimPO Result
### Alternative Option For RLHF: Odds Ratio Preference Optimization
We support the method introduced in the paper [ORPO: Monolithic Preference Optimization without Reference Model](https://arxiv.org/abs/2403.07691) (ORPO). Which is a reference model free aligment method that mixes the SFT loss with a reinforcement learning loss that uses odds ratio as the implicit reward to enhance training stability and efficiency. To use ORPO in alignment, use the [train_orpo.sh](./training_scripts/train_orpo.sh) script, You can set the value for `lambda` (which determine how strongly the reinforcement learning loss affect the training) but it is optional.
#### ORPO Result
### Alternative Option For RLHF: Kahneman-Tversky Optimization (KTO)
We support the method introduced in the paper [KTO:Model Alignment as Prospect Theoretic Optimization](https://arxiv.org/pdf/2402.01306) (KTO). Which is a aligment method that directly maximize "human utility" of generation results.
For KTO data preparation, please use the script [prepare_kto_dataset.sh](./examples/data_preparation_scripts/prepare_kto_dataset.sh). You will need preference data, different from DPO and its derivatives, you no longer need a pair of chosen/rejected response for the same input. You only need data whose response is associated with a preference label--- whether the response is okay or not, read the papre for more details. You also need to convert your data to the following intermediate format before you run the data preparation script.
```jsonl
{
"prompt": [
{
"from": "user",
"content": "What are some praise words in english?"
},
{
"from": "assistant",
"content": "Here's an incomplete list.\n\nexcellent, fantastic, impressive ..."
},
{
"from": "user",
"content": "What's your favorite one?"
}
],
"completion": {
"from": "assistant",
"content": "impressive."
},
"label": true
}
```
For training, use the [train_kto.sh](./examples/training_scripts/train_orpo.sh) script, You may need to set the value for `beta` (which determine how strongly the reinforcement learning loss affect the training), `desirable_weight` and `undesirable_weight` if your data is biased (has unequal number of chosen and rejected samples).
#### KTO Result
## Hardware Requirements
For SFT, we recommend using zero2 or zero2-cpu for 7B model and tp is your model is extra large. We tested the VRAM consumption on a dummy dataset with a sequence length of 2048. In all experiments, we use H800 GPUs with 80GB VRAM and enable gradient checkpointing and flash attention.
- 2 H800 GPU
- zero2-cpu, micro batch size=4, VRAM Usage=22457.98 MB
- zero2, micro batch size=4, VRAM Usage=72390.95 MB
- 4 H800 GPUs
- zero2_cpu, micro batch size=8, VRAM Usage=19412.77 MB
- zero2, micro batch size=8, VRAM Usage=43446.31 MB
- zero2, micro batch size=16, VRAM Usage=58082.30 MB
- zero2, micro batch size=8, lora_rank=8, VRAM Usage=21167.73 MB
- zero2, micro batch size=8, lora_rank=32, VRAM Usage=21344.17 MB
For PPO, we suggest using Tensor Parallelism. The following table shows the VRAM consumption of training a 7B model (llama2-7B-hf) on a dummy dataset with a sequence length of 2048 and a layout length of 512 with different tp_size (equal to the number of GPUs).
| PPO | tp=8 | tp=4 |
|-------|---------------|---------------|
| bs=1 | 18485.19 MB | 42934.45 MB |
| bs=4 | 25585.65 MB | 42941.93 MB |
| bs=16 | 41408.28 MB | 56778.97 MB |
| bs=30 | 64047.42 MB | failed |
For DPO, we recommend using zero2 or zero2-cpu. We tested the VRAM consumption on a dummy dataset with 2048 sequence length.
- 2 H800 GPU
- zero2-cpu, micro batch size=2, VRAM Usage=36989.37 MB
- zero2-cpu, micro batch size=4, VRAM Usage=48081.67 MB
- 4 H800 GPUs
- zero2, micro batch size=4, VRAM Usage=67483.44 MB
For SimPO, we recommend using zero2 or zero2-cpu. We tested the VRAM consumption on a dummy dataset with 2048 sequence length.
- 2 H800 GPU
- zero2-cpu, micro batch size=4, VRAM 25705.26 MB
- zero2, micro batch size=4, VRAM Usage=73375.04 MB
- 4 H800 GPUs
- zero2_cpu, micro batch size=8, VRAM Usage=36709.36 MB
- zero2, micro batch size=4, VRAM Usage=44330.90 MB
- zero2, micro batch size=8, VRAM Usage=56086.12 MB
For ORPO, we recommend using zero2 or zero2-cpu. We tested the VRAM consumption on a dummy dataset with 2048 sequence length.
- 2 H800 GPU
- zero2-cpu, micro batch size=4, VRAM 26693.38 MB
- zero2, micro batch size=4, VRAM Usage=74332.65 MB
- 4 H800 GPUs
- zero2_cpu, micro batch size=8, VRAM Usage=38709.73 MB
- zero2, micro batch size=4, VRAM Usage=45309.52 MB
- zero2, micro batch size=8, VRAM Usage=58086.37 MB
For KTO, we recommend using zero2-cpu or zero2 plugin, We tested the VRAM consumption on a dummy dataset with 2048 sequence length.
- 2 H800 GPU
- zero2-cpu, micro batch size=2, VRAM Usage=35241.98 MB
- zero2-cpu, micro batch size=4, VRAM Usage=38989.37 MB
- 4 H800 GPUs
- zero2_cpu, micro batch size=2, VRAM_USAGE=32443.22 MB
- zero2, micro batch size=4, VRAM_USAGE=59307.97 MB
## List of Supported Models
For SFT, we support the following models/series:
- Colossal-LLaMA-2
- ChatGLM2
- ChatGLM3 (only with zero2, zero2_cpu plugin)
- Baichuan2
- LLaMA2
- Qwen1.5-7B-Chat (with transformers==4.39.1)
- Yi-1.5
For PPO and DPO, we theoratically support the following models/series (without guarantee):
- Colossal-LLaMA-2 (tested)
- ChatGLM2
- Baichuan2
- LLaMA2 (tested)
- Qwen1.5-7B-Chat (with transformers==4.39.1)
- Yi-1.5
*-* The zero2, zero2_cpu plugin also support a wide range of chat models not listed above.
## Inference example
We support different inference options, including int8 and int4 quantization.
For details, see [`inference/`](https://github.com/hpcaitech/ColossalAI/tree/main/applications/Chat/inference).
## Attention
The examples are demos for the whole training process. You need to change the hyper-parameters to reach great performance.